Struggling with Handstand Push-Ups? Start with These 3 Progressions
If you’re a CrossFit athlete over 30 and handstand push-ups still feel like an unsolvable puzzle, you’re not alone.
At Lewis Physical Therapy & Sports Rehabilitation, I specialize in helping injured CrossFitters get back to their Rx workouts without having to scale forever. And when it comes to handstand push-ups, most athletes are missing one of three critical components: control, strength, and/or positional awareness.
Here are three essential progressions I recommend to help you build the strength, control, and confidence you need to finally master the handstand push-up—without banging your head on the floor.
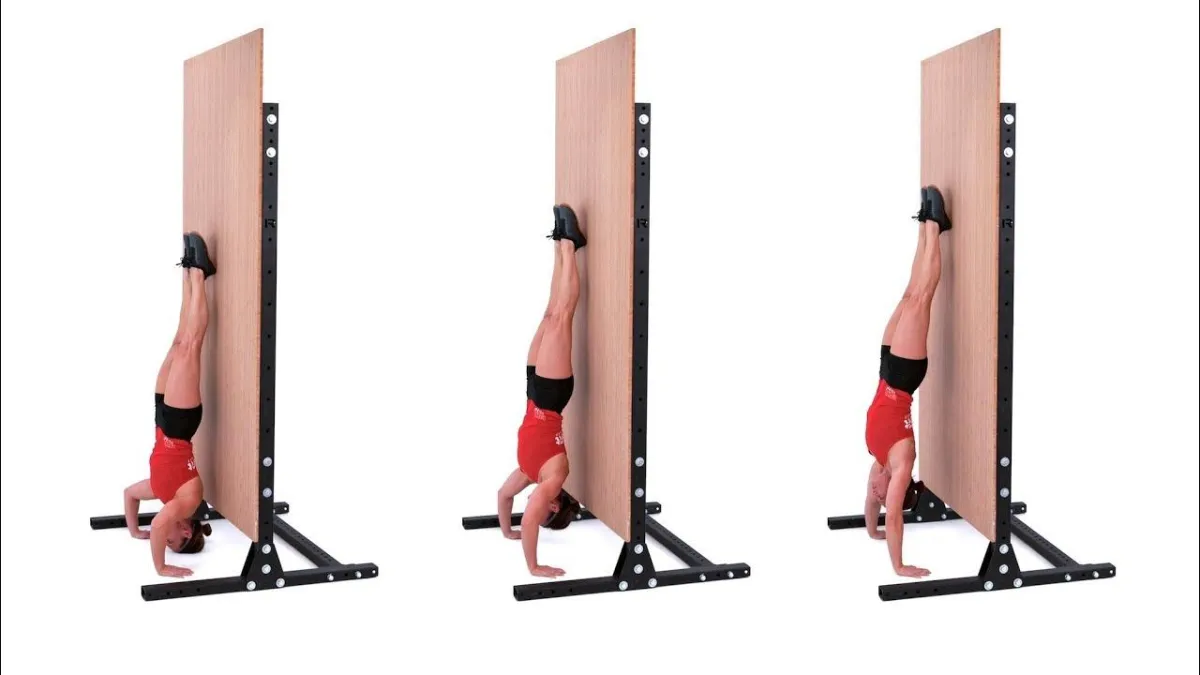
1. Reverse Wall Walks: Build Control & Overhead Stability
Most CrossFitters try to muscle their way through handstand push-ups without ever earning the position. Reverse wall walks are the perfect way to build comfort and control in the overhead position while developing total-body stability upside down.
The key here? Slow and controlled movement. Don’t rush through the reps or sway side-to-side like you’re dodging punches. Focus on quality over quantity—3 to 5 reps with a tight core, braced midline, and intentional hand placement will go a long way.
2. Ring Dips: Develop Your Pushing Power
Let’s be real—just because you can kick up into a handstand doesn’t mean you’re strong enough to press out of the bottom. That’s where ring dips come in.
Ring dips challenge your upper body strength and your stability. If you can’t perform at least 5-6 solid ring dips (with or without a kip), you’re not ready for high-rep handstand push-ups.
Make sure your range of motion is full and your shoulders are under control—don’t bottom out or crash into the rings, as that’s a fast track to a shoulder injury.
3. Handstand Holds: Own the Position
Finally, we need to build static tolerance and confidence in the upside-down position. If your handstand feels shaky or your back arches excessively, you’re putting your joints in compromised positions before you even start to press.
I recommend athletes build up to 15-20 second holds with feet supported on the wall. Keep your core tight and your body aligned in a straight line—imagine you’re a plank, not a banana.
If that’s too advanced right now, start with box handstand holds or pike holds and progress from there.
The Takeaway
To master the handstand push-up, don’t skip steps. Progress with purpose:
✅ Reverse Wall Walks for control
✅ Ring Dips for strength
✅ Handstand Holds for positional tolerance
If you’re tired of scaling HSPUs or worried about tweaking your shoulders again, I’ve got something for you. Text “Rx” to 732-724-1381 and I’ll send you a free copy of my guide, “The Rx Blueprint”—a step-by-step plan to rebuild your body, eliminate pain, and get back to Rx workouts safely.
Train smart. Stay strong. And don’t let the wall win.
Dr. Jeff Lewis
Lewis Physical Therapy & Sports Rehabilitation
